
Best Bass Equalizer Settings for MacBook Pro: Deep, Clean Sound on Any Setup
Introduction
Bass makes music feel alive. It adds impact to movies and games and gives weight to every soundtrack. Yet, even with the improved speakers on modern MacBook Pro models, the low end can still sound thin or muddy if you do not tune it properly. That is where smart equalizer (EQ) settings come in.
This guide focuses on the best bass equalizer settings for MacBook Pro so you can get deeper, cleaner bass from built-in speakers, headphones, and external speakers. You will learn what bass really is, which tools to use on macOS, and how to create presets for different use cases like music, movies, and gaming.
Instead of guessing with random sliders, you will follow practical steps and example curves you can copy, test, and tweak. The goal is not just more bass, but better bass that sounds full and controlled, without distortion or fatigue.
What ‘Bass’ Really Means on a MacBook Pro
Before you start changing settings, it helps to know what ‘bass’ actually means. Bass is not one single sound. It covers a range of low frequencies that affect how powerful and warm your audio feels. On a MacBook Pro, you mostly deal with three key ranges:
- Sub-bass (20–60 Hz)
- You feel it more than you hear it.
- It gives rumble to explosions and deep synths.
-
Laptops struggle the most here due to small drivers.
-
Bass (60–250 Hz)
- This holds the body of kick drums, bass guitars, and many beats.
-
It is the main area to boost if you want stronger low end.
-
Low mids (250–500 Hz)
- This range adds warmth and thickness.
- Too much makes sound muddy or boxy.
MacBook Pro speakers are compact, so they cannot move as much air as large speakers. This limits real sub-bass, but you can still improve perceived bass by shaping these ranges.
A good bass EQ curve on a MacBook Pro usually:
- Slightly boosts the 60–150 Hz range for more punch.
- Controls the 200–400 Hz range to prevent mud.
- Avoids heavy boosts below 60 Hz, where the hardware struggles.
Once you understand where bass lives in the frequency spectrum, it becomes clear why the built-in speakers can sound good yet still benefit from EQ. The next step is to see how the MacBook Pro hardware works in 2024 and why equalization remains useful even on well-tuned laptops.
MacBook Pro Audio Hardware in 2024 and Why EQ Still Matters
Recent MacBook Pro models offer some of the best laptop speakers on the market. They include:
- High-excursion woofers that handle more dynamic movement.
- Multiple drivers that spread sound for a wider stereo image.
- Built-in support for spatial audio with certain apps and content.
This hardware delivers surprisingly rich sound for a slim laptop, especially in the midrange and upper bass. Still, the laws of physics remain. The speakers are small, and the chassis is thin. You cannot expect them to replace a dedicated subwoofer or large speakers.
That is why EQ still matters. It lets you:
- Make the most of the available bass without pushing speakers too hard.
- Fix tonal imbalances for your ears, your room, and your content.
- Match your MacBook Pro sound to your headphones and external speakers.
Even with good factory tuning, Apple must choose a ‘one size fits most’ profile. Your ears, listening habits, room, and gear are different. The right EQ settings help bridge that gap and tailor the sound to you.
To take advantage of that flexibility, you need the right software. Next, you will set up equalizer tools on macOS that can shape bass across your entire system, not just inside a single app.
Setting Up an Equalizer on macOS for System-Wide Bass Control
You have two main paths to adjust bass on a MacBook Pro: the built-in EQ in the Music app and third-party system-wide EQ tools. Both can help; they just serve different needs.
Using the Apple Music Equalizer for Quick Bass Tweaks
If you mainly listen to music through the Apple Music app, its built-in EQ is the fastest solution. To use it:
- Open Music on your MacBook Pro.
- Click Window in the menu bar.
- Select Equalizer.
- Check On to enable it.
- Choose a preset like Bass Booster or create your own.
You will see sliders for different frequency bands. You can:
- Raise the 60 Hz and 150 Hz sliders slightly for more bass.
- Lower the 250–400 Hz bands if the sound becomes muddy.
The downside: this EQ only affects audio inside the Music app. It does not change bass for YouTube, games, browsers, or other players. For a consistent sound across your Mac, you need a system-wide tool.
Installing a System-Wide EQ App on MacBook Pro
System-wide EQ apps apply your settings to all sound output from your MacBook Pro. Popular choices include:
- eqMac
- Boom 3D
- SoundSource (with plugins)
General setup steps look like this:
- Download and install your chosen EQ app.
- Grant required permissions in System Settings → Privacy & Security if prompted.
- Set the app output to your speakers, headphones, or audio interface.
- Select a starting preset or keep it flat.
Once active, your EQ changes will affect everything: streaming, browsers, games, video calls, and more. This is ideal when you want consistent bass across all apps and all listening scenarios.
Basic EQ Controls Explained: Frequencies, Gain, and Q
Most EQ apps share common controls:
- Frequency: the part of the spectrum you change (for example, 80 Hz for bass).
- Gain: how much you boost or cut that frequency (measured in dB).
- Q (Bandwidth): how wide or narrow the affected range is.
Practical tips:
- Use small boosts (1–4 dB) in the bass region rather than extreme changes.
- Cut problematic frequencies (muddy low mids) before boosting others.
- Use a wider Q (lower value) for natural-sounding bass boosts.
With your tools in place and the basics of EQ under control, you are ready to apply specific bass settings. The first target is the MacBook Pro built-in speakers, which most users rely on every day.
Best Bass Equalizer Settings for MacBook Pro Built-In Speakers
MacBook Pro built-in speakers sound good for their size, but they still benefit from careful tuning. The aim is to add weight and warmth without making them distort or buzz. A smart approach is to start with a gentle ‘smile’ curve: a slight bass boost, a small mid cut, and a tiny lift in the highs.
This shape helps the speakers sound fuller and more open while respecting their limits. You want to enhance what the hardware already does well, not force it into territory it cannot handle.
Recommended Starting EQ Curve for MacBook Pro Speakers
Use these example settings as a starting point in your EQ app (values are suggestions, not strict rules):
- 60 Hz: +1 to +2 dB (subtle boost, do not overdo it)
- 100–125 Hz: +2 to +3 dB (main bass punch area)
- 250–350 Hz: −1 to −2 dB (reduce mud and boxiness)
- 2–4 kHz: 0 dB (leave mid detail mostly flat)
- 8–10 kHz: +1 dB (slight air and clarity)
Listen to a few tracks you know well. If the bass feels stronger but still controlled, you are on the right track. If it sounds boomy, reduce the 125 Hz boost or lower the 250–350 Hz area a bit more.
How to Boost Bass Without Distortion or Rattling
Built-in speakers can distort if you force too much bass. To avoid problems:
- Keep total bass boosts small (under +4 dB).
- Use lower volume when testing big changes.
- If you hear crackling or rattling, reduce gain on the lowest bands first.
- Avoid large boosts below 60 Hz; the speakers cannot reproduce them well.
If you need much more low end than the speakers can handle cleanly, it is better to move to headphones or external speakers instead of pushing the laptop.
Sample ‘Balanced Bass for MacBook Pro’ Preset
A simple preset you can try:
- 60 Hz: +1 dB
- 120 Hz: +3 dB
- 300 Hz: −2 dB
- 8 kHz: +1 dB
Save it as ‘Balanced Bass – MBP’ and use it as your daily listening profile for built-in speakers.
Laptop speakers are convenient, but the biggest upgrade in bass usually comes from headphones and earbuds. Next, you will tune those devices for deeper, more controlled low end.
Best Bass Equalizer Settings for Headphones and Earbuds
Headphones and earbuds can deliver far better bass than laptop speakers, especially over-ear models that seal around your ears. EQ fine-tuning here makes a huge difference in enjoyment and accuracy.
Different designs behave differently, so your settings should match the type of device you use most. Over-ear and on-ear headphones, as well as wireless earbuds, each respond in their own way.
EQ Tips for Over-Ear and On-Ear Headphones
Over-ear and on-ear headphones usually provide the most satisfying bass. To tune them:
- Start from a flat profile in your EQ.
- Gently boost the 60–100 Hz range by +2 to +4 dB for more thump.
- If the bass feels too heavy, lower 200–300 Hz by −1 to −3 dB.
- Add a tiny boost around 8–10 kHz if the sound feels dark.
Example curve:
- 60 Hz: +3 dB
- 120 Hz: +2 dB
- 250 Hz: −2 dB
- 3 kHz: 0 dB
- 9 kHz: +1 dB
Test with your favorite tracks. Focus on kick drums, bass lines, and vocals. You want them strong and defined, not boomy or harsh.
EQ Tips for Wireless Earbuds on MacBook Pro
Wireless earbuds often already have boosted bass from the factory. Too much extra boost can turn them muddy. For earbuds:
- Boost bass more gently: +1 to +2 dB at 80–120 Hz if needed.
- Check the 200–400 Hz range. If vocals sound thick, cut slightly.
- Some earbuds need a small high-end boost around 7–9 kHz for clarity.
Example curve:
- 80 Hz: +1 dB
- 150 Hz: +1 dB
- 300 Hz: −1 dB
- 8 kHz: +1 dB
Keep changes modest, then adjust based on your specific model. Many popular earbuds overemphasize bass, so do not assume you always need more low end.
Ready-Made Presets: Bass-Boosted, Neutral, and Warm
You can create three quick presets for your headphones and earbuds:
- Bass-Boosted: +3–4 dB at 60–100 Hz, small cut at 250–300 Hz.
- Neutral: flat with tiny tweaks (±1–2 dB) to match your taste.
- Warm: slight boost at 120–200 Hz and a mild cut around 3–5 kHz.
Save these in your EQ app and switch based on mood or content. For example, choose Neutral when working, Warm for long listening sessions, and Bass-Boosted for energetic playlists.
While headphones give you a private, controlled environment, external speakers can fill a room with sound. To get the most from them, you need to think about both EQ and placement.
Best Bass Equalizer Settings for External Speakers and Soundbars
External speakers and soundbars can unlock much more bass than any laptop speaker. Even smaller desktop speakers paired with a subwoofer can deliver a far richer low end.
EQ still helps, because your desk, walls, and room shape your sound. Placement and tuning go hand in hand, and sometimes a small move makes a bigger difference than a big EQ change.
Desktop Speaker Placement and Bass Response
Before touching EQ, optimize speaker placement:
- Keep speakers at ear level or slightly below.
- Place them at equal distance from you, forming a triangle.
- Avoid pushing them directly against the wall; leave space to reduce boom.
- If you use a subwoofer, experiment with its position to avoid strong room resonances.
Better placement reduces the need for drastic EQ changes and lets your speakers produce cleaner bass with less effort.
EQ Curve for Bookshelf Speakers and Soundbars
For bookshelf speakers or soundbars on your desk:
- Boost the 60–90 Hz region by +2 to +4 dB for impact.
- Cut the 120–200 Hz area slightly if the bass feels boomy.
- Keep the midrange (500 Hz–3 kHz) fairly neutral for clear vocals.
Example curve:
- 60 Hz: +3 dB
- 100 Hz: +2 dB
- 160 Hz: −2 dB
- 1 kHz: 0 dB
- 10 kHz: +1 dB
Adjust based on your room. If your desk amplifies certain low frequencies, fine-tune around those bands. Trust your ears and use familiar tracks as references.
Sample ‘Desktop Bass Boost’ Preset
Try this as a starting preset for external speakers:
- 70 Hz: +3 dB
- 120 Hz: +2 dB
- 180 Hz: −2 dB
It should give you punch and warmth without overwhelming the rest of the mix.
You now have solid bass settings for built-in speakers, headphones, and external speakers. The next step is to adapt these to what you actually do on your MacBook Pro every day: listening to music, watching movies, and gaming.
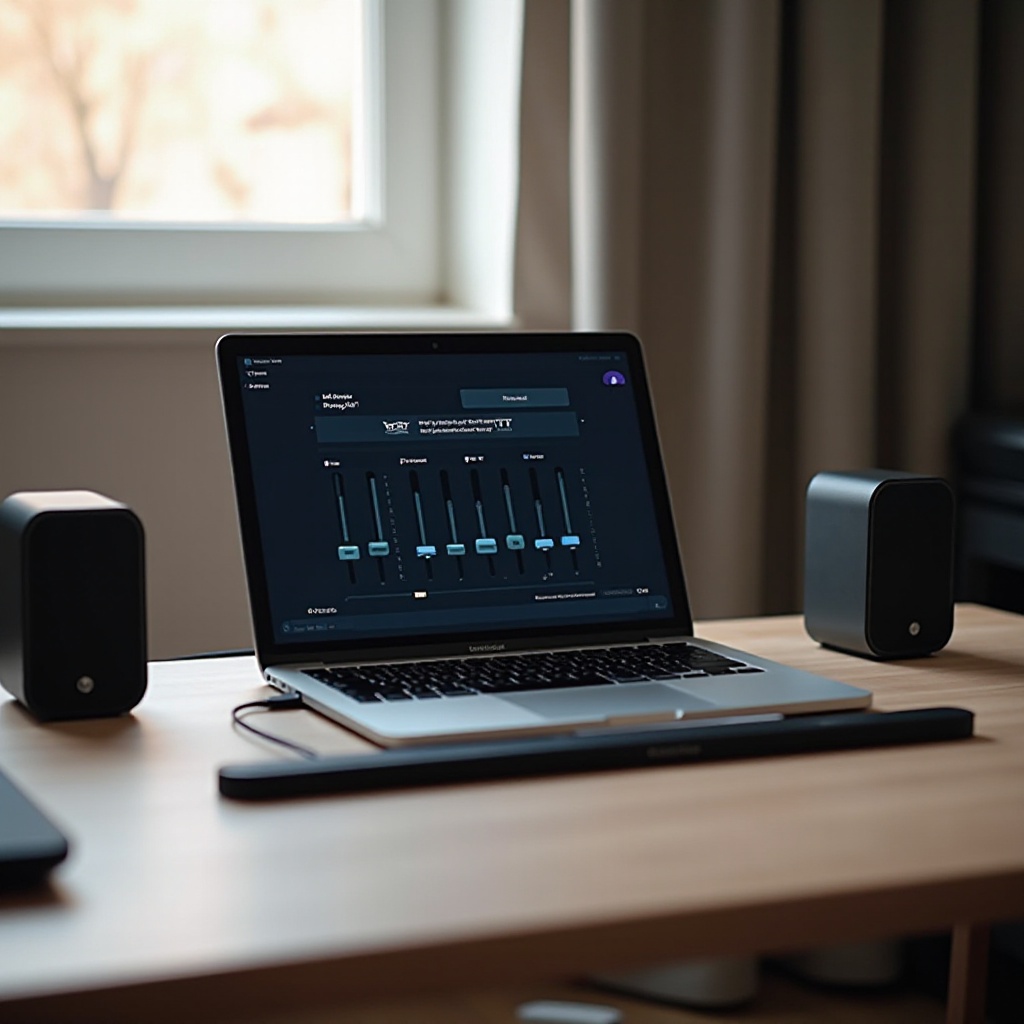
Use-Case Based Bass Profiles for Your MacBook Pro
Different tasks call for different bass balances. The settings that make EDM sound huge might drown out dialogue in movies or hide important sounds in games. Creating use-case presets helps you switch quickly without redoing your EQ from scratch.
Music Streaming: Hip-Hop, EDM, Pop, and Rock
For music-focused listening, tailor your bass to the genre:
- Hip-Hop / EDM:
- Boost 60–100 Hz by +3–4 dB.
-
Apply a slight cut at 250–300 Hz if low end gets thick.
-
Pop / Rock:
- Use a moderate boost at 80–120 Hz (+2–3 dB).
- Keep low mids slightly trimmed for clarity, especially on busy mixes.
These settings emphasize kick drums and bass lines without masking vocals and guitars, letting your playlists hit harder while remaining clear.
Movies and Series: Impactful Bass with Clear Dialogue
For movies and shows, you want impact without losing speech clarity:
- Boost the 60–90 Hz range by +2–3 dB for weight.
- Keep 120–200 Hz under control to avoid a bloated sound.
- Consider a small boost around 2–3 kHz for clearer dialogue.
This way, explosions and sound effects have weight, but dialogue stays easy to understand, even at lower night-time volumes.
Gaming: Punchy Explosions Without Muddy Footsteps
For gaming, you want punchy effects and clear positional cues:
- Apply a mild boost at 70–100 Hz (+2–3 dB) for gunshots and explosions.
- Add a slight cut at 200–300 Hz to prevent murky soundscapes.
- Keep 2–5 kHz fairly flat for footstep and detail clarity.
These balances help you enjoy cinematic sound while still hearing important in-game information that can improve your performance.
Even with good presets, you may run into issues like distortion, muddiness, or inconsistent bass. That is when simple troubleshooting steps can save time and frustration.
Troubleshooting Common Bass Problems on MacBook Pro
If your bass still does not sound right, you can usually fix it with a few targeted adjustments. Most problems fall into three categories: muddy sound, distortion, or hardware limits.
Muddy, Boomy, or Hollow Bass
If your audio sounds muddy or boomy:
- Reduce 200–400 Hz by 1–3 dB.
- Check if you boosted too much at 80–150 Hz and lower it slightly.
- Test with several tracks; some songs are mixed bass-heavy already.
If the sound feels hollow or thin instead:
- Increase 80–120 Hz a bit (+1–2 dB).
- Make sure you did not cut the low mids too aggressively.
Small adjustments go a long way. Make one change at a time, then listen before moving on.
Crackling, Distortion, and Volume Issues
Distortion usually means something is pushed too hard:
- Lower the master volume in your EQ app and in macOS.
- Reduce boosts in the lowest bands first.
- Check if multiple apps are boosting audio (for example, EQ app plus Music app preset).
If you hear crackling only at very high volume, consider that as a limit of the speakers or headphones. Reducing volume slightly often clears it up and protects your gear.
When You Need External Gear Instead of More EQ
EQ cannot fix everything. You may need external gear when:
- You want strong, physical sub-bass you can feel in your chest.
- Built-in speakers distort even with gentle boosts.
- You work with audio professionally and need accurate monitoring.
In those cases, invest in:
- Quality over-ear headphones.
- Powered desktop speakers or a soundbar with a subwoofer.
EQ will then refine this stronger foundation instead of trying to compensate for hardware limits.
When your bass problems are under control, it is useful to have a simple reference you can copy into your EQ app. The next section offers that quick starting point.
Quick Reference: Copy-Ready Bass EQ Presets
To make things easier, here are three simple presets you can copy into most EQ apps as a starting point. Adjust by 1–2 dB to match your taste and your specific MacBook Pro, headphones, or speakers.
Preset for Built-In MacBook Pro Speakers
- 60 Hz: +1 dB
- 120 Hz: +3 dB
- 300 Hz: −2 dB
- 8 kHz: +1 dB
Name: MBP Speakers – Balanced Bass
Preset for Headphones and Earbuds
- 60 Hz: +3 dB
- 120 Hz: +2 dB
- 250 Hz: −2 dB
- 9 kHz: +1 dB
Name: Headphones – Punchy Bass
For earbuds, you might reduce each boost by 1 dB if they already have strong bass.
Preset for External Speakers and Soundbars
- 70 Hz: +3 dB
- 120 Hz: +2 dB
- 180 Hz: −2 dB
- 10 kHz: +1 dB
Name: Desktop – Bass Boost
Use these as flexible templates. The best bass equalizer settings for MacBook Pro will vary slightly based on your model, room, and gear, but these curves give you a solid base.
Conclusion
Getting the best bass equalizer settings for MacBook Pro is about balance, not just turning everything up. You now understand what bass really is, how your MacBook Pro hardware shapes the sound, and which tools on macOS give you the most control.
With system-wide EQ apps and smart presets, you can enhance built-in speakers, headphones, and external speakers for music, movies, and gaming. Start with the suggested curves, then fine-tune by 1–2 dB at a time while you listen to familiar tracks.
If your laptop speakers reach their limits, let headphones or external speakers take over, and use EQ to polish the sound rather than fight the hardware. With a bit of careful tuning, your MacBook Pro can deliver bass that is deeper, cleaner, and far more satisfying every day.
Frequently Asked Questions
What are the best bass equalizer settings for MacBook Pro built-in speakers?
A great starting point is a gentle curve: +1 dB at 60 Hz, +3 dB at 120 Hz, −2 dB at 300 Hz, and +1 dB at 8 kHz. This adds weight while keeping the sound clean. Adjust each band by 1–2 dB to taste and avoid heavy boosts below 60 Hz, which can cause distortion on the small laptop drivers.
Can I get good bass from a MacBook Pro without external speakers?
Yes, you can get surprisingly good bass from recent MacBook Pro models using careful EQ. Boost the 80‑150 Hz range slightly and control low mids around 250‑400 Hz. While you will not match a subwoofer, you can achieve a full, pleasing tone for everyday listening. For deep, physical bass you can feel, headphones or external speakers remain the better option.
Do bass-boosted EQ settings harm my MacBook Pro speakers or headphones?
Moderate bass boosts used at reasonable volume levels are usually safe. Problems arise when you combine large boosts (over +5–6 dB) with maximum volume. This can cause distortion and stress the drivers over time. Keep boosts small, test at lower volume first, and back off if you hear rattling or crackling. When you want much more low end, upgrade your audio gear instead of pushing EQ too far.